
Zoom Tutorials
 Guide to setting up a Zoom teaching session
Downloadable PDF summarizes options to consider when teaching line with Zoom, and links to Zoom guides on how to enable them when setting up a session.
Guide For Presenting with Zoom
Downloadable PDF lists instructions and best practices for using Zoom, creating presentations, presenting PowerPoints, and recording in PowerPoint and Zoom.
The resources below addresses specific Zoom features, and some of the most commonly asked questions about Zoom. For a full library of support articles and videos, visit the Zoom Help Center.
BCH How-To Guides
Getting Started with Zoom for Desktop (PDF download)
Zoom FAQs (PDF download)
Zoom and HIPAA (PDF download)
Scheduling Meetings for Another User (Scheduling Privilege) (PDF download)
Schedule and Complete a Zoom Virtual Visit (PDF download)
Best Practices for Zoom Audio Quality (PDF download)
Accessing Zoom Remotely (PDF download)
Cloud Recording Access Request (network access required)
Recording Posters in Zoom (YouTube video)
Accessing the Zoom Web Portal
To access the web portal, visit https://bostonchildrens.zoom.us/. This site can be accessed from outside of the hospital’s network. From here, you can start, join, and schedule meetings, as well as change settings for your meetings and account.
Tips and Tricks for Education with Zoom
Alan Leichtner, MD, MSHPEd, goes over some useful tools for Zoom workshops in this video, including polling, annotations, and breakout rooms.
Practice before your first meeting.
You can set up a meeting by yourself to get familiar with the controls and make sure your equipment works, or practice with a colleague.
Set aside some time at the beginning of a class or lecture to make sure everyone is connected to audio and video and understands how to use Zoom.
Use the built-in Whiteboard or annotate a collaborative document to engage your participants. See the section Annotating and Using a Whiteboard below for more information.
Don’t forget to pause for questions, reactions, and when you’re sharing files or resources. It may take your participants a few seconds to catch up.
In lecture-style meetings or presentations, start the meeting with all participants muted to cut down on background noise. You can unmute participants as a whole or individually as the meeting progresses.
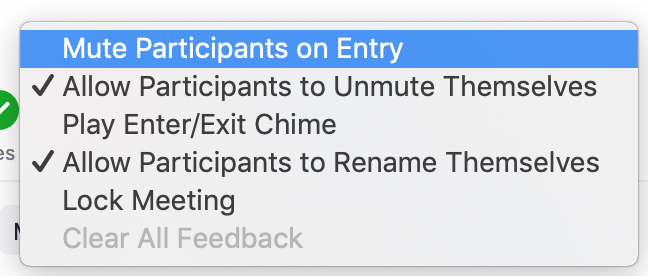
To do this, click “Manage Participants” at the bottom of your meeting window to open the Participants panel. At the bottom, click “More” and select “Mute participants on entry.” You can also toggle whether participants can unmute themselves.
Use “share a portion of your screen” to share a presentation in presenter mode.
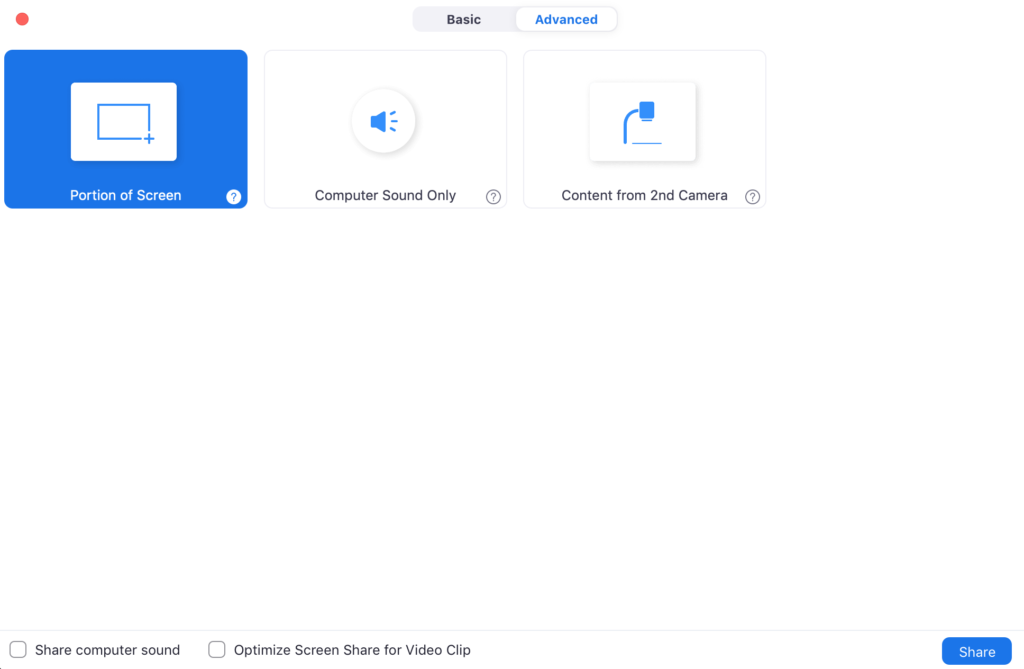
If you only have one monitor but you want to refer to your slide notes during a PowerPoint presentation, click on “Share Screen” in your meeting controls. Then click the “Advanced” tab at the top of the window and select “Portion of Screen.” A green-bordered box will appear on your screen. Launch the presentation in presenter mode and drag the edges of the green box to match the edges of the presentation view.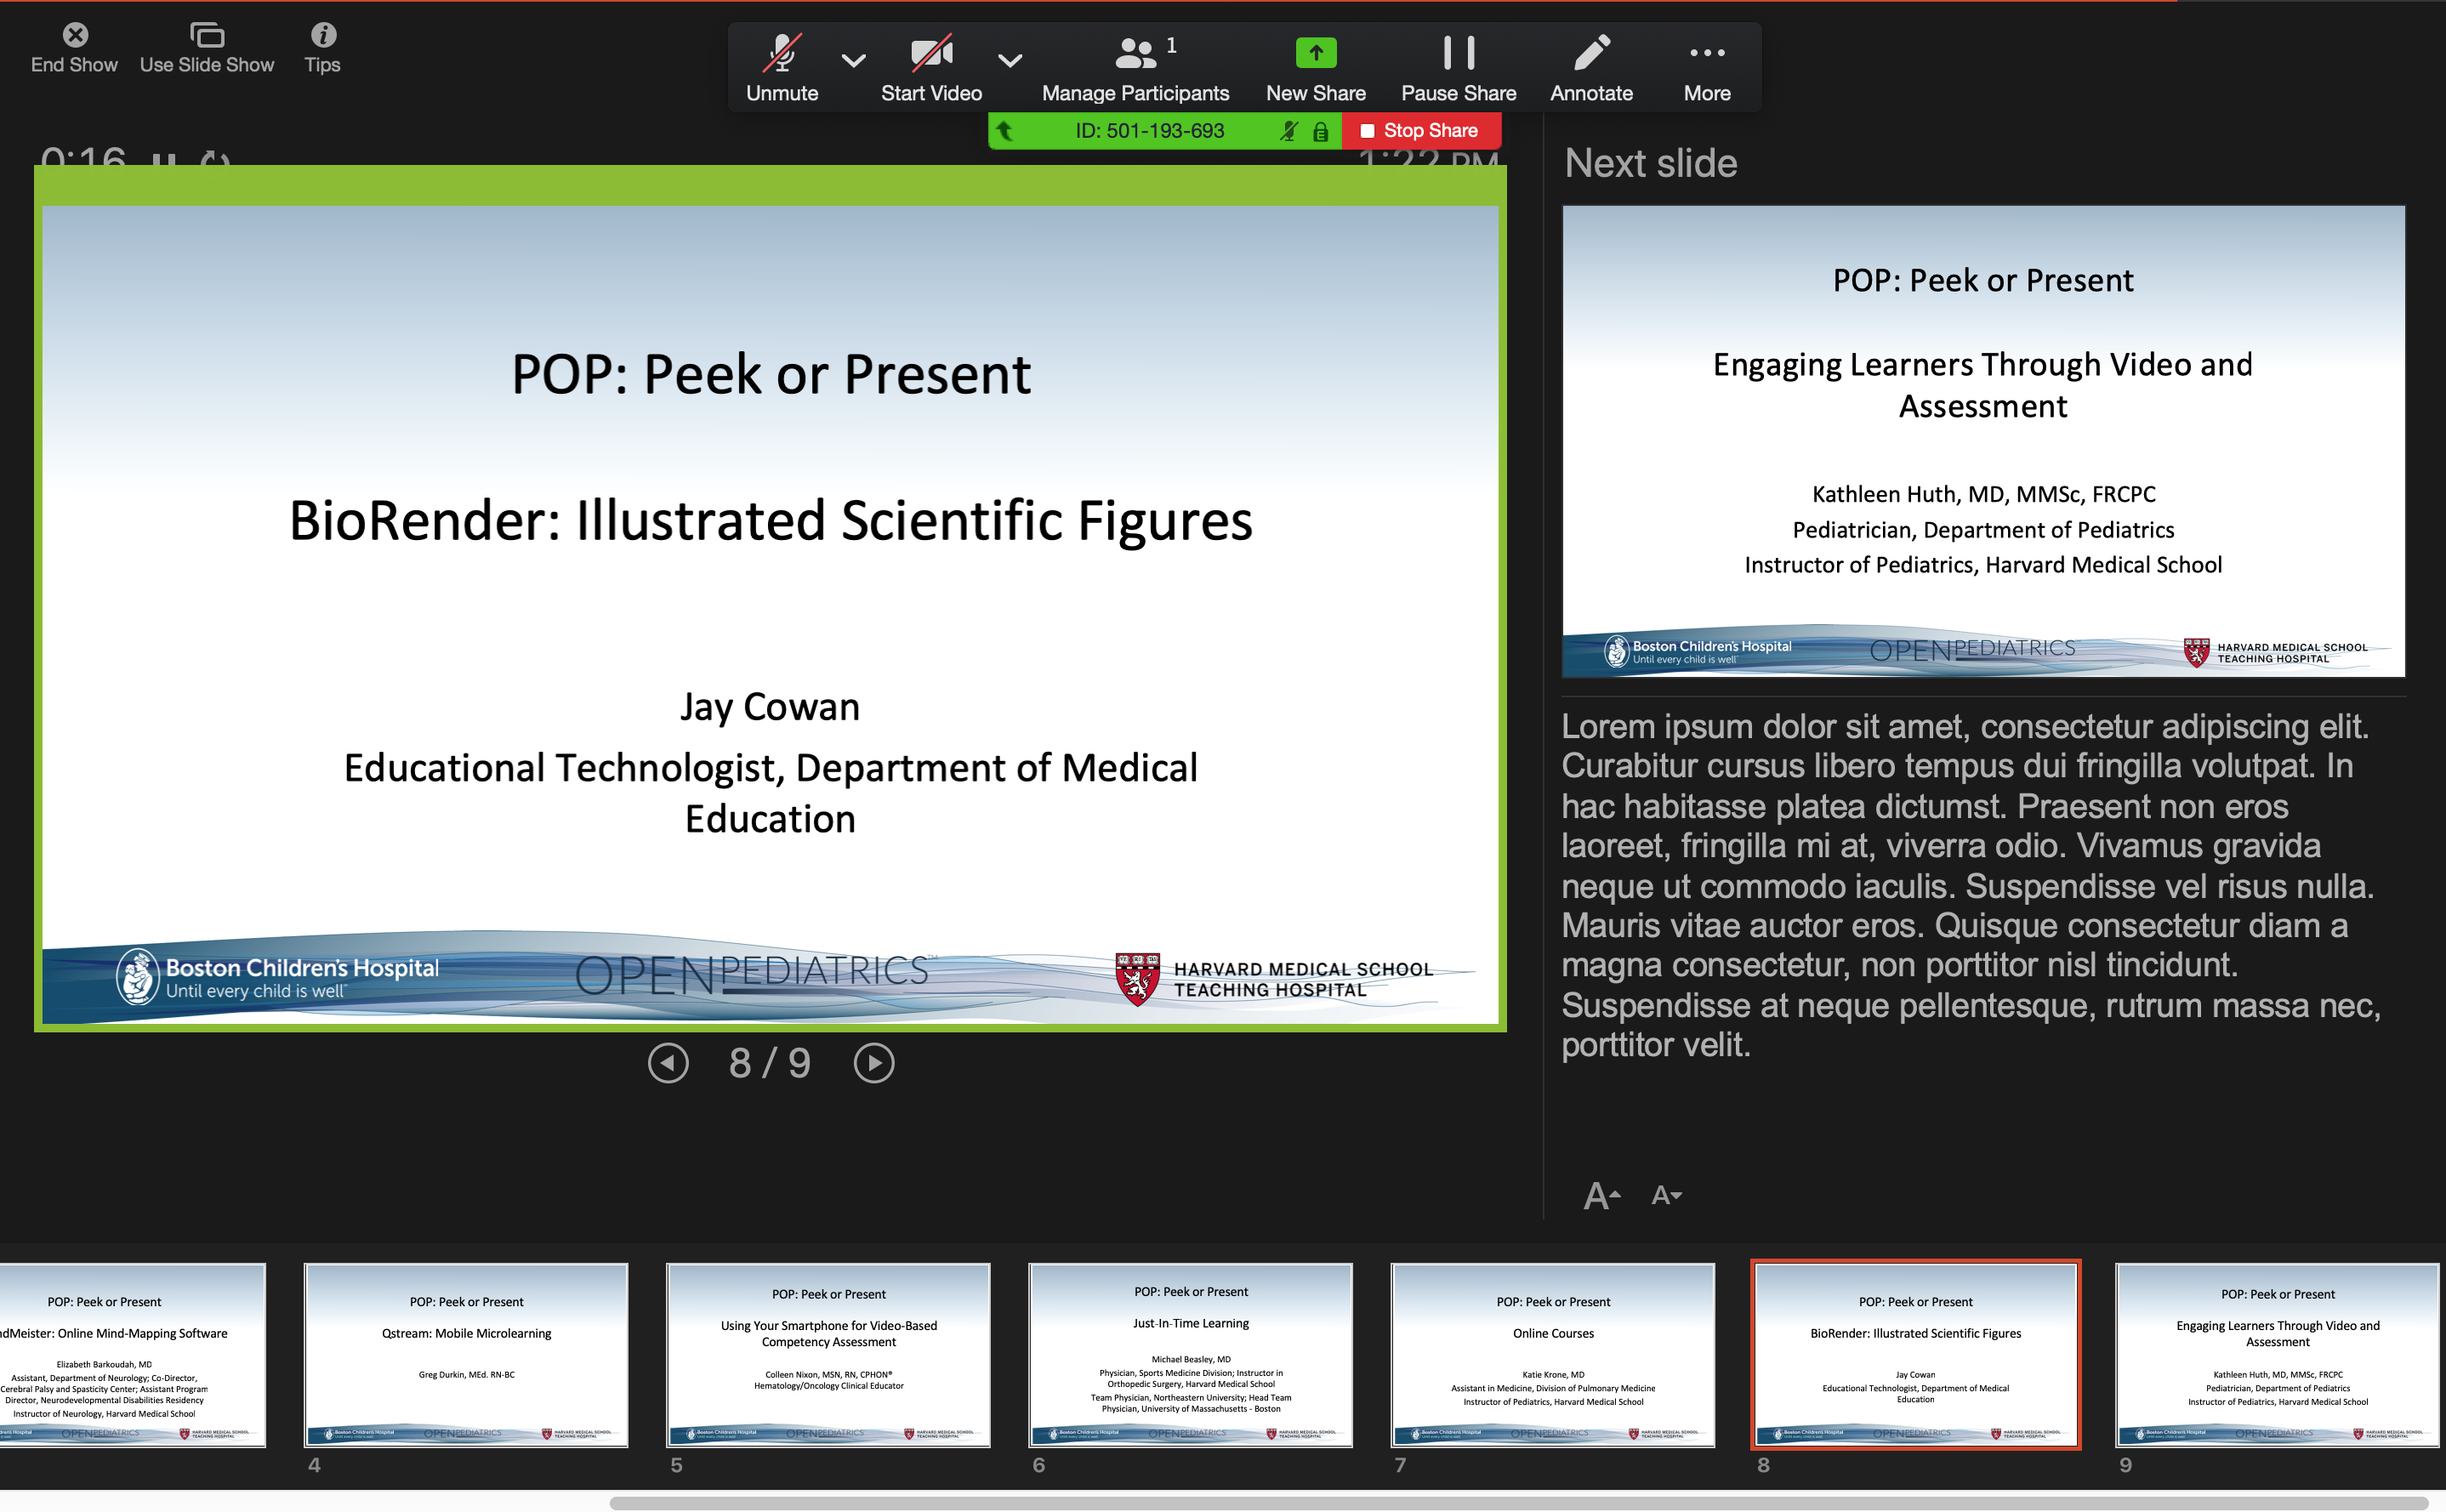
Adapted from Comprehensive Guide to Educating Through Zoom and Tips and Tricks: Teachers Educating on Zoom (external links).
Scheduling a Zoom Meeting
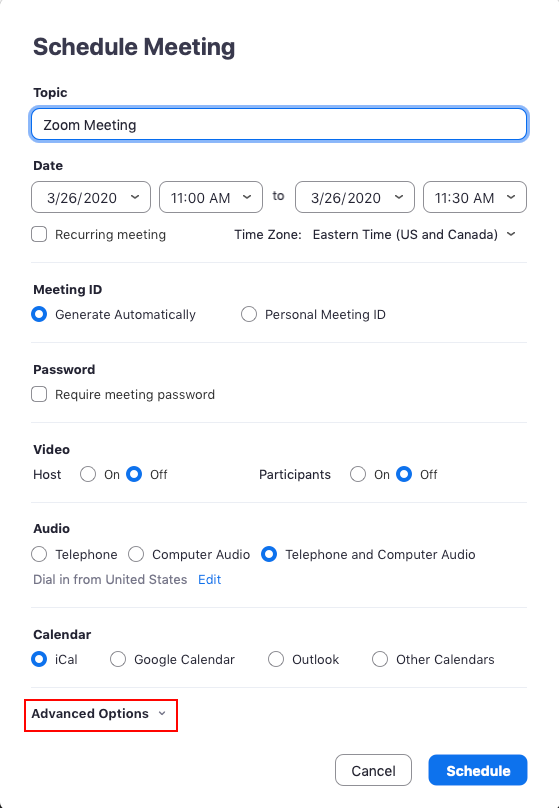
This page covers the basics of setting up a meeting through the Zoom web portal.
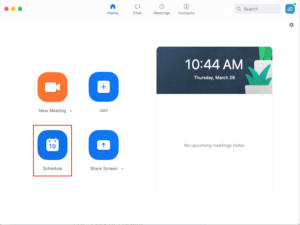
You can also click on “Schedule” in the Zoom desktop client to schedule a meeting without logging into the web portal.
If you are setting up a recurring meeting, you can choose to have the same meeting ID for every instance. This means that you only have to send out one link, and it will be the same for every occurrence of that meeting.
To see some of the other options or assign alternate hosts to the meeting, click “Advanced Options” at the bottom of the window.

Configuring Audio and Video
This page describes how you can test your video during a Zoom meeting.
This page describes how you can test your audio during a Zoom meeting.
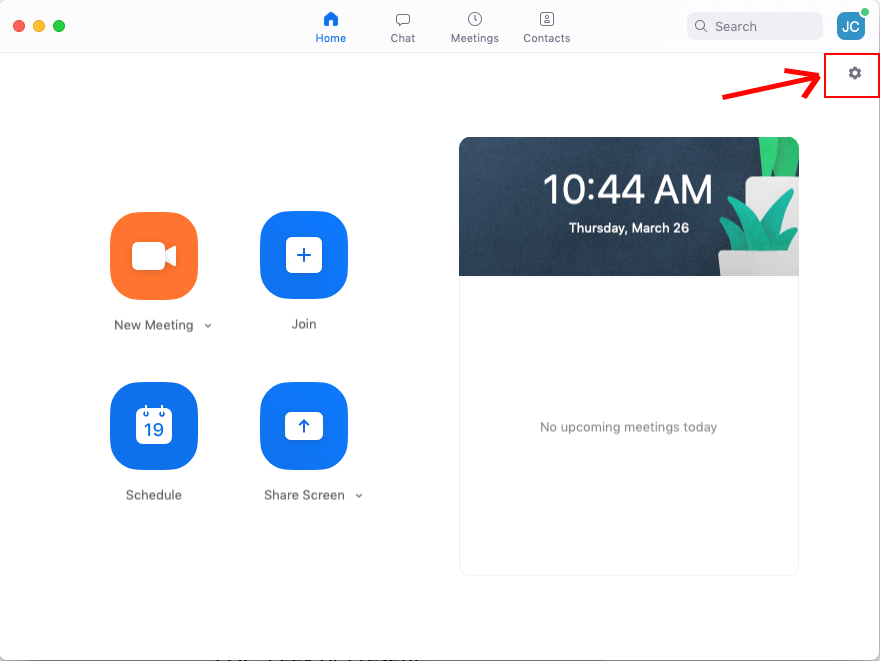
You can also adjust and test your audio and sound settings outside of a meeting in the Zoom desktop client. Click on the Settings icon in the top right of the window:
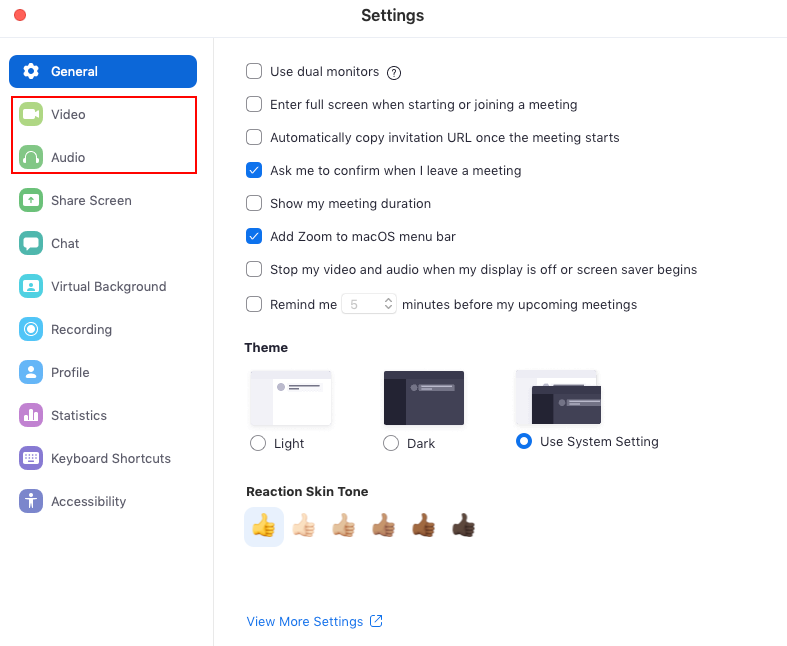
And you can select Video or Audio from the left sidebar:
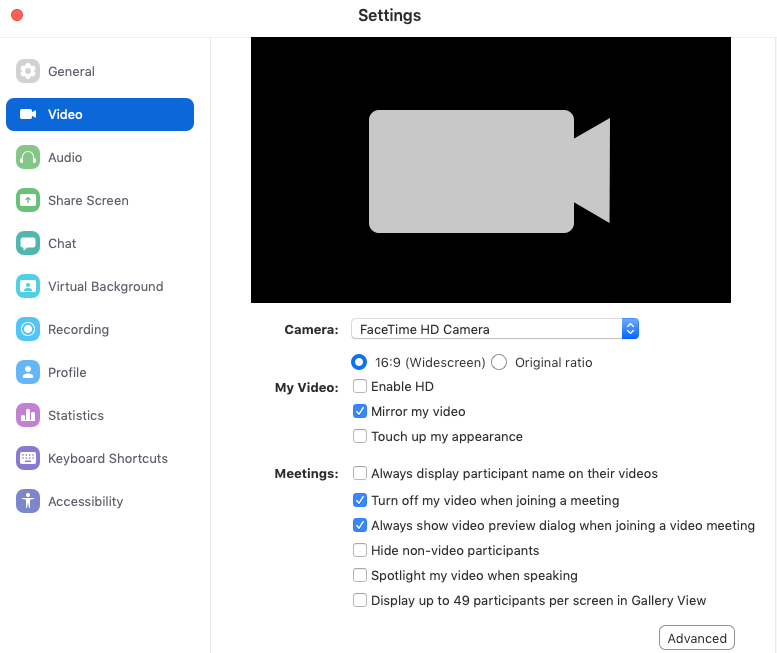
In the Video menu, you will see a preview of your video. If no video shows, try selecting a different source from the drop-down menu below the preview window and make sure nothing is blocking your webcam.
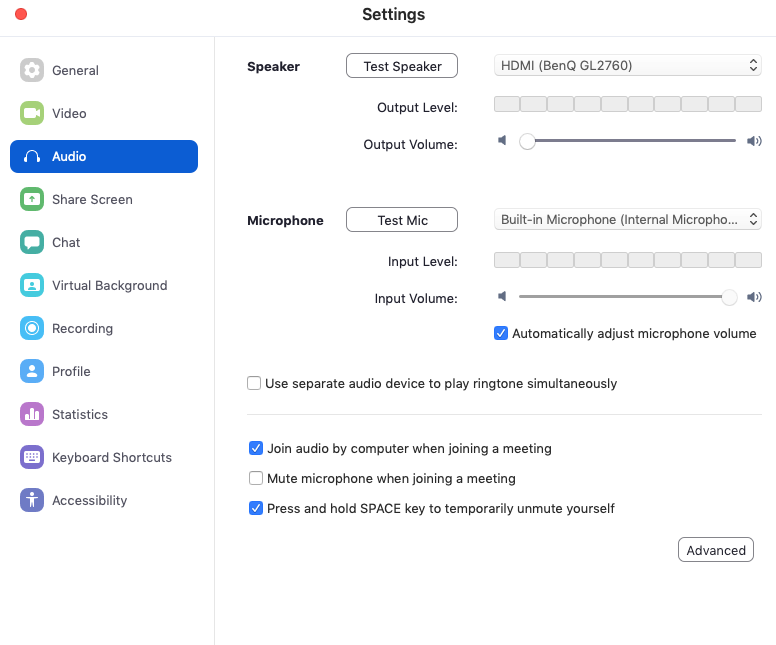
In the audio menu, you can test your speakers and your microphone to make sure you can hear others and they can hear you.
To test your speakers, click the “Test Speaker” button. A short ringtone sound will play. If you don’t hear the sound, try switching the device with the drop-down menu and make sure your system volume is unmuted and turned up. If you’re using headphones, speakers, or an external monitor, they may have separate volume controls.
To test your microphone, click the “Test Mic” button. Say a few words at your normal speaking tone, and the system will automatically play it back. The Input Level scale should show a green bar while you’re speaking; if it doesn’t, try adjusting the Input Volume, moving closer to your mic, or switching the device with the drop-down menu. If you see the green bar but you don’t hear anything, check your speakers as described above.
If you get an echo or feedback while in a call, try the following:
1. Make sure your speakers and microphone aren’t too close to each other. Using headphones will usually result in better sound quality for all participants.
2. If you are watching/using video with a computer, but calling in with a phone for audio, check that your computer audio is muted (both microphone and speakers).
3. If you are in the same room as another participant, switch to using only one computer, individual phones, or calling in on a conference phone.
Meeting Controls
This video covers all the meeting controls the host sees during a meeting.
Note that some buttons and settings are subject to the individual users’ settings. This overview covers default controls and a few less commonly used ones. You can change your settings in the web client.
As a host, this is the basic set of controls you will see upon starting a meeting:

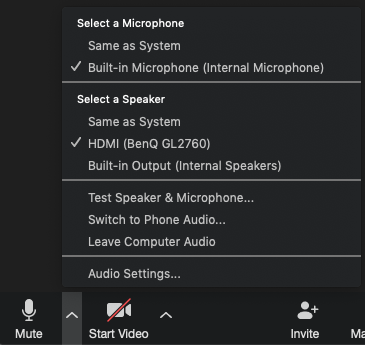
The Mute button toggles mute for your microphone. If you click the carat next to the icon, a menu of audio options will display. There, you can switch which devices you are using for your microphone and speaker, test your microphone and speaker, and open audio settings. If you can’t hear other people in a meeting or they can’t hear you, check this menu to make sure your mic is unmuted and your speakers are working properly.
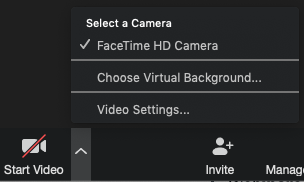
Next to the Mute button is the Video button, which toggles your camera. If you click the carat next to the icon, you can change your camera device, use a virtual background, and open video settings. If your video is not displaying, make sure you’re using the correct camera and nothing is blocking it. For more details on audio and video settings, see Configuring Audio and Video above.
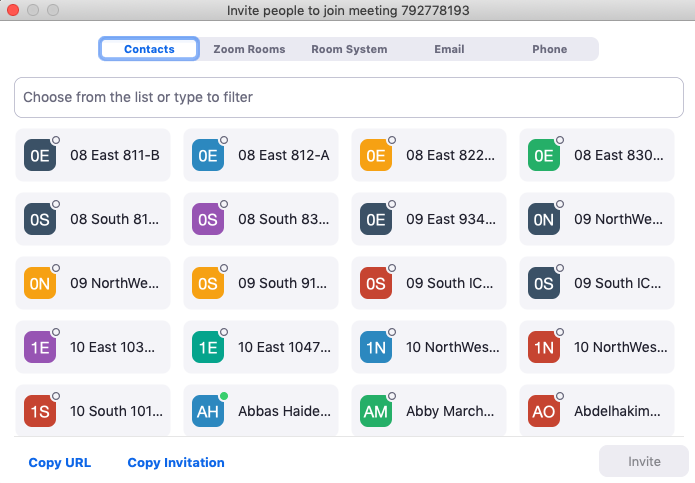
Click on “Invite” to add people to your meeting. By default, this brings up a list of people in your organization, but you can use the tabs at the top to invite participants by email address or phone number.
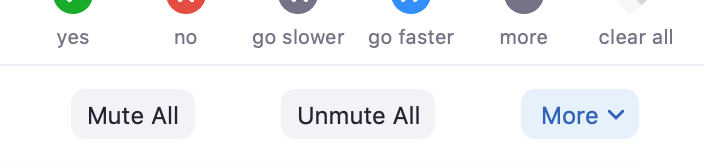
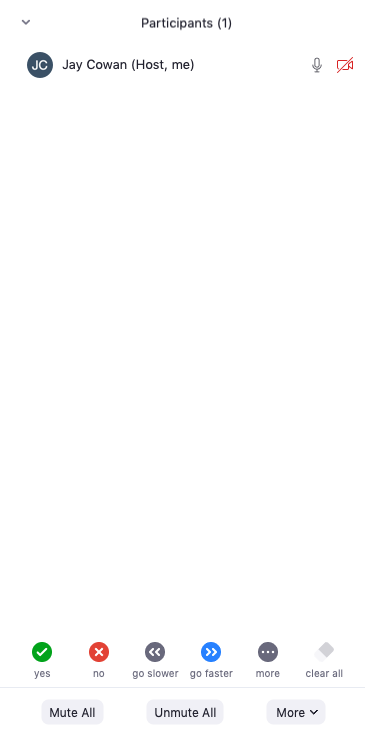
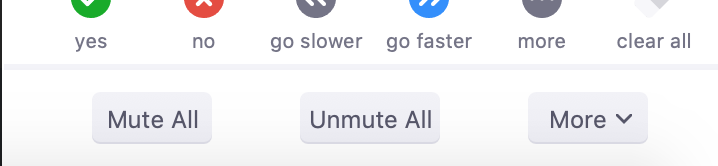
Click on “Manage Participants” to open the participants sidebar. Here, you can see everyone connected to the meeting. As the host, you can use the controls at the bottom of the panel to mute or unmute everybody at once, which can be helpful for isolating audio issues, or you can mute/unmute participants individually by hovering over their name and clicking Mute or Unmute. The bottom of the participants panel also offers interaction buttons that can be used by all participants to engage in the meeting even when their mics are muted.
Share Screen allows you to share a portion or all of your screen with other meeting participants. For more information, see the section on Screen Sharing below.
During a screen share, you and other participants can annotate directly on the image in real time. For more information, see the section on Annotating and Using the Whiteboard below.
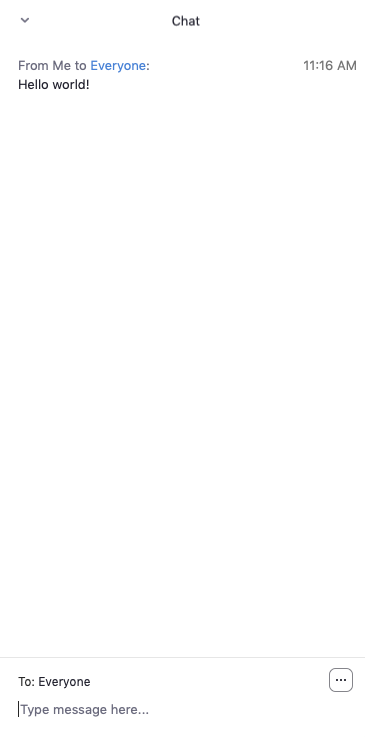
On the default control bar, clicking chat will open the meeting chat window. Here, all participants can communicate through text chat, and individual participants can be messaged privately.
Next to Chat is the Record button. See Recording Meetings below for details on recording.
Next to the Record button is the Breakout Rooms button. See Breakout Rooms below for more details on how to use breakout rooms.
Reactions allow participants to react non-verbally with an emoji that displays for a few seconds. More reactions can be found in the Participants panel.
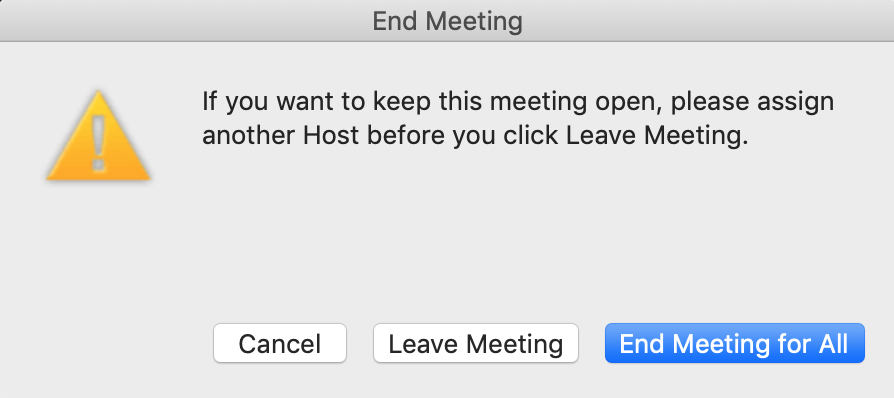
Ending the meeting first brings up a dialog box where you can choose to leave the meeting or end it for all participants. If you want to leave a meeting that you’re hosting, you must first assign a new host to the meeting with the Participants panel.
Screen Sharing
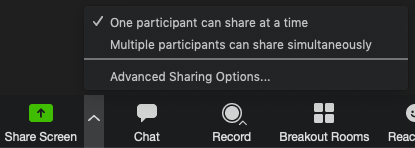
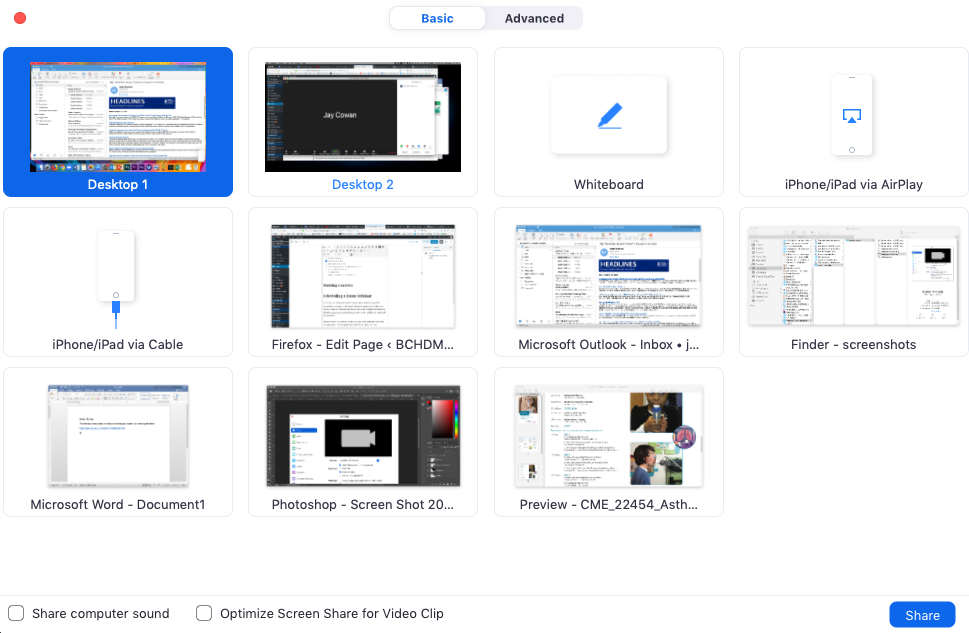
Click on “Share Screen” in your meeting control bar to begin screen sharing. This first brings up a window where you can choose what to share. You can choose to share your entire desktop, a specific application window, create a collaborative whiteboard, or share an external device. If you want to share your computer audio as well, make sure to check the “share computer sound” box in the bottom left. If this option doesn’t appear, you will have to disable participant sharing. Click on the carat next to the Share Screen button and make sure the option “One participant can share at a time” is selected.
If you are sharing a specific window, you will have to create a new share if you wish to switch to a different window.
Clicking “Advanced” also allows you to share a portion of your screen, audio only, or share from a second camera.
When you click Share, your selected source will be shared in the meeting. Your screen will change so that a green border shows around the window(s) you’re sharing, and a slightly different toolbar will display at the top of your screen. Pausing your share will suspend it temporarily, allowing you to navigate or prepare materials before resuming. Starting a new share will replace your current shared window, and clicking Stop Share will end your sharing entirely, returning to the default video view.

Recording Meetings
This page covers starting a recording and the difference between a cloud and local recording.
The ability for BCH employees to record meetings to the cloud is available upon request at this link on Web2: Cloud Recording Access Request (network access required). As detailed in the request form, cloud recordings are not encrypted, and therefore meetings recorded to the cloud may not contain any PHI/PII or otherwise confidential information.
By default, only the host can record a meeting. Permission for other participants to record a meeting can be granted on an individual basis, by opening the Participants panel, hovering over a user’s name, and selecting “Allow Recording” from the More… menu.
Annotation and Using a Whiteboard
Annotation allows you to draw and type on your screen, visible to all participants. Participants also have this option, and can draw on your screen as it’s being shared to highlight or ask questions. Zoom also has a whiteboard function, which serves as a blank canvas for multiple participants to collaborate on.
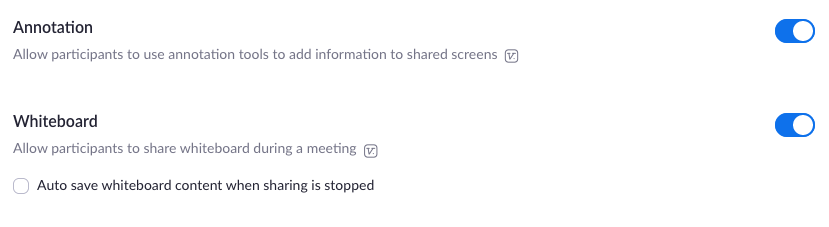
Log in to the web portal to make sure the whiteboard and annotation settings are turned on for your account. Go to Settings > In Meeting (Basic) and scroll down until you find the settings.
Once your meeting is started, click “Share Screen” and select your source to get started. The control bar at the top of the screen will have an icon labeled “Annotate”. Clicking on it will open a second toolbar with annotation tools that you can use on your shared screen.


To use the whiteboard, click “Screen Share” and select the Whiteboard from the share options.
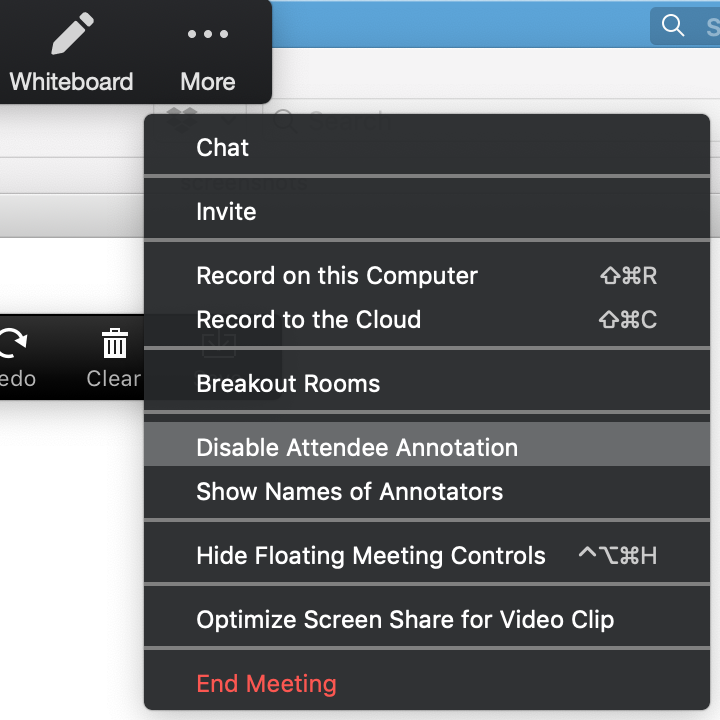
With the annotation setting on, your participants will be able to use the Annotate controls to add information to any shared screen. If you don’t want your participants to be able to annotate in a particular meeting, you can turn off the setting. While in a screen share, click More in your control bar and select “Disable Attendee Annotation.” This setting resets for every new meeting.
Meeting Security
There are several ways to secure your Zoom meetings to ensure that only the people you intend to include are participating, as well as controls to handle participant behavior.
Passwords
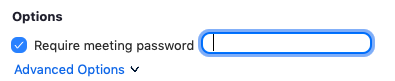
You can set a password for any scheduled meeting through the desktop or web clients. While the scheduling dialog box is open, scroll to the Options section, check the box “Require meeting password,” and type in the password you want to set. Participants will start to join the meeting as usual and will be prompted to type in the password before being connected.
Note that when you send out meeting invitations, the password will be included automatically. It will also be displayed on the Invite Participants window during the meeting, as shown below.

Registration
To require registration for meetings and webinars, you must schedule or edit them through the web portal. See Accessing the Zoom Web Portal above for help.
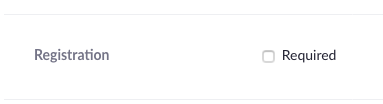
While scheduling or editing, check the box “Registration Required” and save the meeting.
Then, viewing the meeting details, you will see a link for registration has been generated.

Scroll to the bottom of the meeting details page to see settings for the registration form. Click the Edit link to the right of the Registration Options to change the settings.

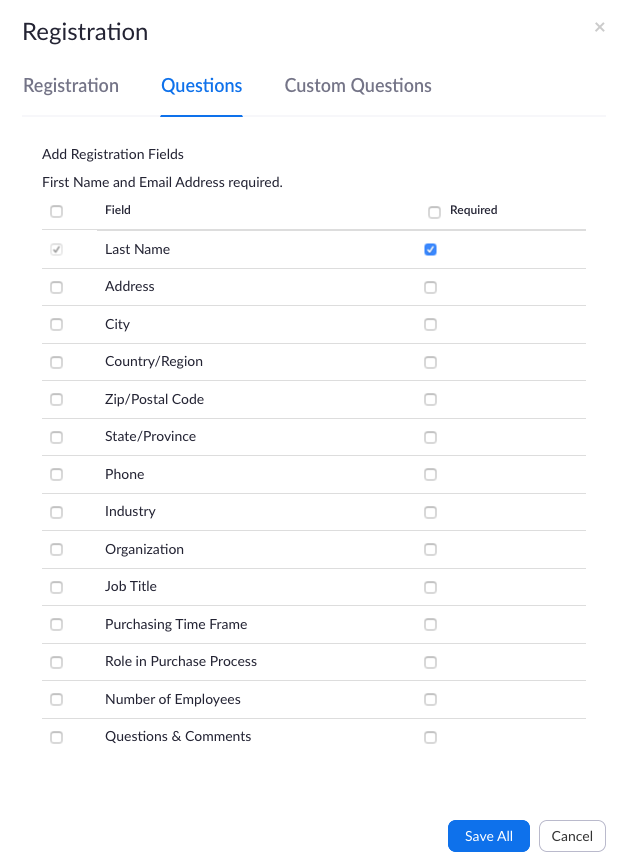
In the settings windows, you can choose whether registrants are approved automatically or need to be approved manually by the organizer, whether an email is sent to the organizer whenever someone registers, and set the questions that appear on the registration form.
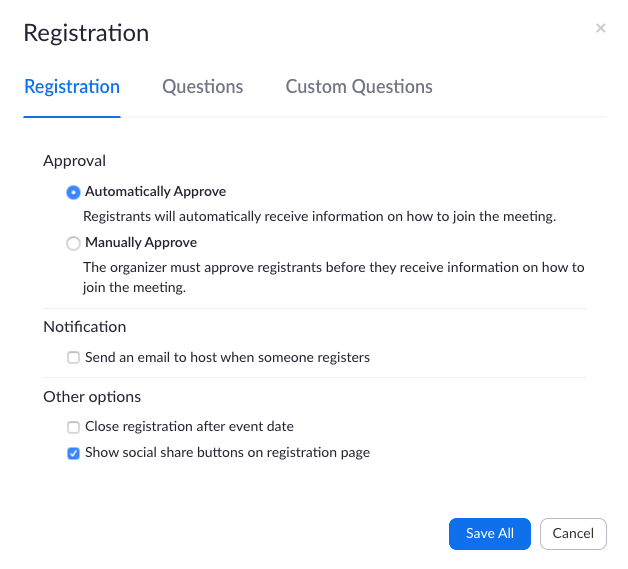
Once you are finished with your settings, click Save All at the bottom of the window and send out the registration link to your attendees. After registering, participants will receive an email with instructions on how to join the meeting.
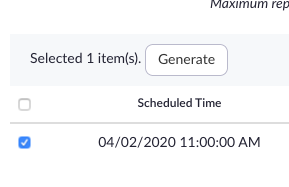
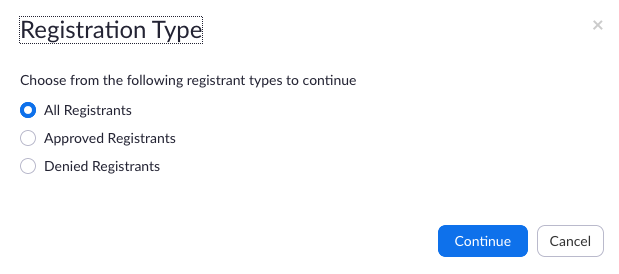
After a meeting is complete, you can generate a report of registered attendees. Note that these reports are only available for 30 days after the meeting. To access the report, log in to the web portal and click “Reports” in the left sidebar. Select Meeting or Webinar (depending on which type your meeting was), check the box next to your meeting, and click “Generate.” In the pop-up box, select which attendees will be shown on the report. This will create a downloadable CSV file.
Locking a Meeting
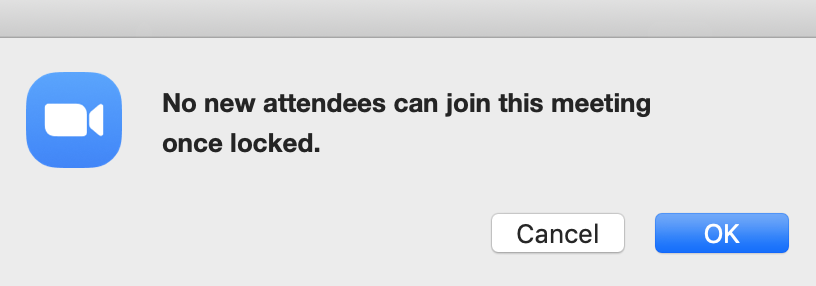
A meeting can be locked while in progress to prevent any more participants from joining.
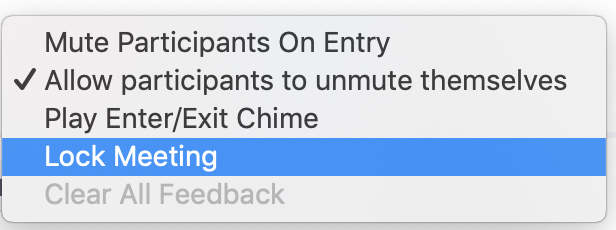
Open the Participants panel by clicking Manage Participants in the meeting control bar. At the bottom of the panel, click the More button to open additional options and select Lock Meeting. A confirmation dialog box will pop up; select OK to finish locking the meeting.
The words “Meeting Locked” will display in the top of the window when this is complete:

The meeting can be unlocked by repeating these steps; the option in the menu will now read Unlock Meeting.
Waiting Rooms
The video goes over how to set up the waiting room for your meetings and manage participants entering and leaving with it.
Waiting rooms can be used to control who is in a meeting at what time. Setting up a meeting with a waiting room must be done from the web portal – for help, see Accessing the Zoom Web Portal above.
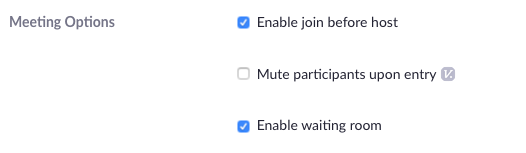
While scheduling or editing a meeting in the web portal, scroll down to the Meeting Options and check the box “Enable Waiting Room.”
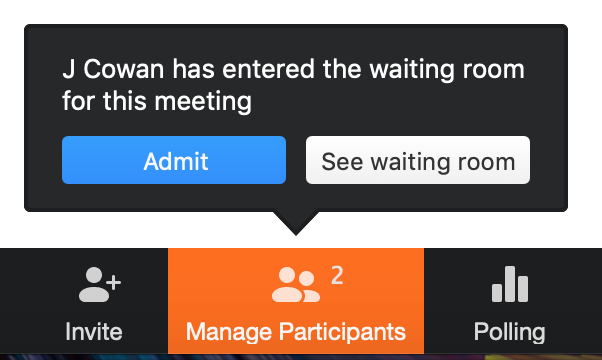
Start the meeting. Once a participant joins, they will automatically be put in the waiting room and you will get a notification from the Participants panel. Click on Participants or select “See waiting room” to see all participants currently in the waiting room. Participants in the waiting room cannot see each other or how many people are waiting.
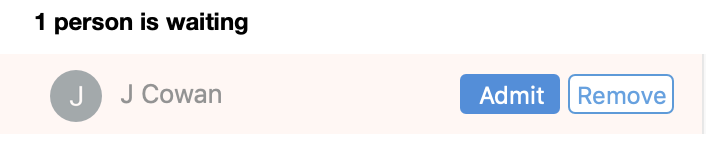
From here, you can admit participants to the meeting individually. Once they are in the meeting, you can remove them by clicking “More” next to their name in the Participant panel and selecting Remove. Be aware that participants can not rejoin the meeting at all after they have been removed this way. If you want to allow participants to join again later in the meeting, select Put in Waiting Room instead. This will kick the participant back to the waiting room until you choose to admit them again.
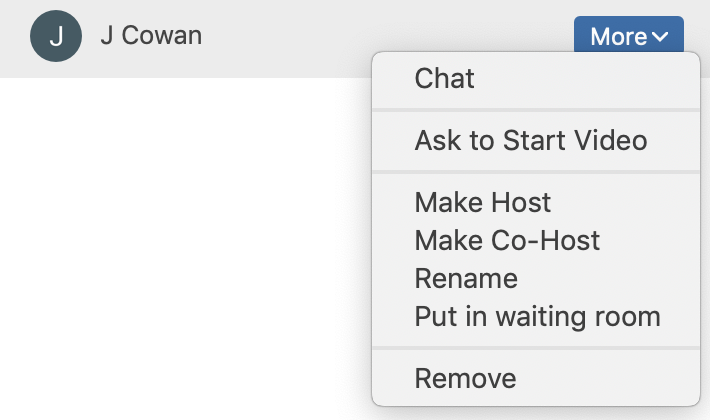
Put on Hold/Remove
During a meeting, you can put a participant on hold or remove them if necessary. Both of these options are available in the Participants panel. Click the Manage Participants button in the meeting controls bar, hover the mouse over the name of the participant you wish to remove, and click the “More” button to see options.
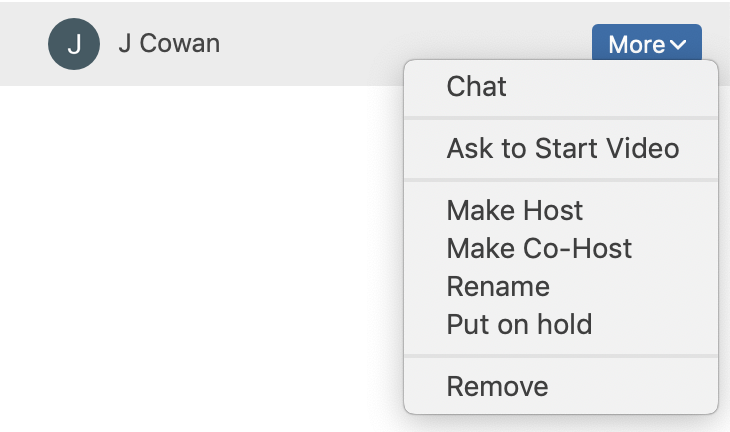
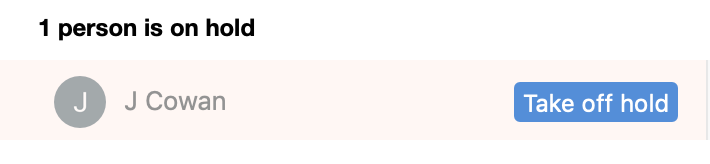
Putting a participant on hold works similarly to a phone hold – a participant on hold will not see or hear what is happening in the meeting, and will not be able to interact. They will show up in a separate section in the Participants panel; click the “Take off hold” button to return them to the meeting.
Removing a participant kicks them out of the meeting entirely, and they can not rejoin the meeting while it is still running.
Zoom and HIPAA
eHelp at Boston Children’s Hospital has put together resources for using Zoom for telehealth and meetings potentially containing PHI/PII. For the complete guidelines, visit eHelp’s Zoom Conferencing Page (network access required).
See also Zoom and HIPAA (PDF download) for more information.
For any meetings where PHI/PII may be displayed or discussed:
Meeting passwords are required
Recording of meetings is not allowed
Use of a waiting room is recommended
Recommended for all meetings:
Meeting passwords
Restricting screen sharing to the host when possible
Assign a unique meeting ID to each meeting (don’t use your personal ID)
Monitor the participant list during the meeting, and/or assign a co-host to assist
Webinars vs. Meetings
The page covers the basics of scheduling a webinar through the Zoom web portal.
A webinar is a virtual event where you can have hosts and panelists presenting to attendees with limited interaction options, much like an in-person lecture or conference. Zoom provides tools to register attendees in advance, ask poll questions, create breakout rooms, and for the audience to ask questions.
Webinars must be scheduled in advance, and can only be set up from the web portal. See “Accessing the Zoom Web Portal” above for help.
Polling
The video covers how to launch a poll and share results during a Zoom meeting. Read below to see how to set up polling for your meeting or webinar.
Polls allow you to survey participants in your meetings and review the results after. Polls can only be set up from the web portal – see “Accessing the Zoom Web Portal” above for help.
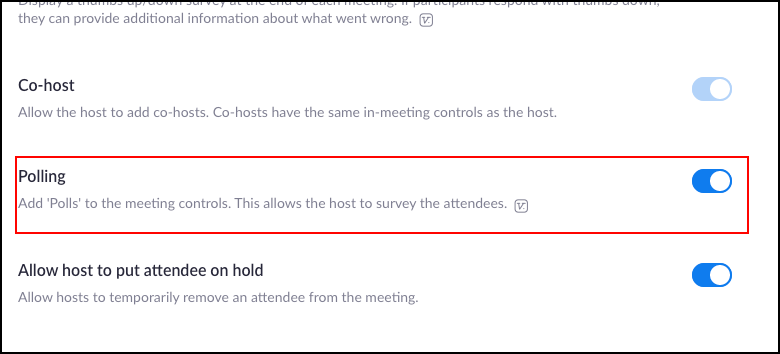
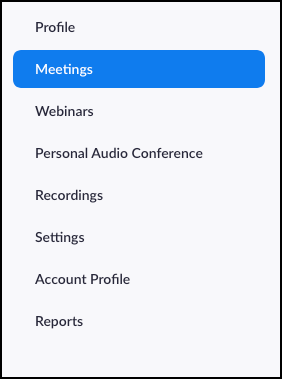
You may need to turn on polling for your account before using it. After logging into the web portal, click on “Settings” in the left sidebar, then “In Meeting (Basic)” in the secondary sidebar.
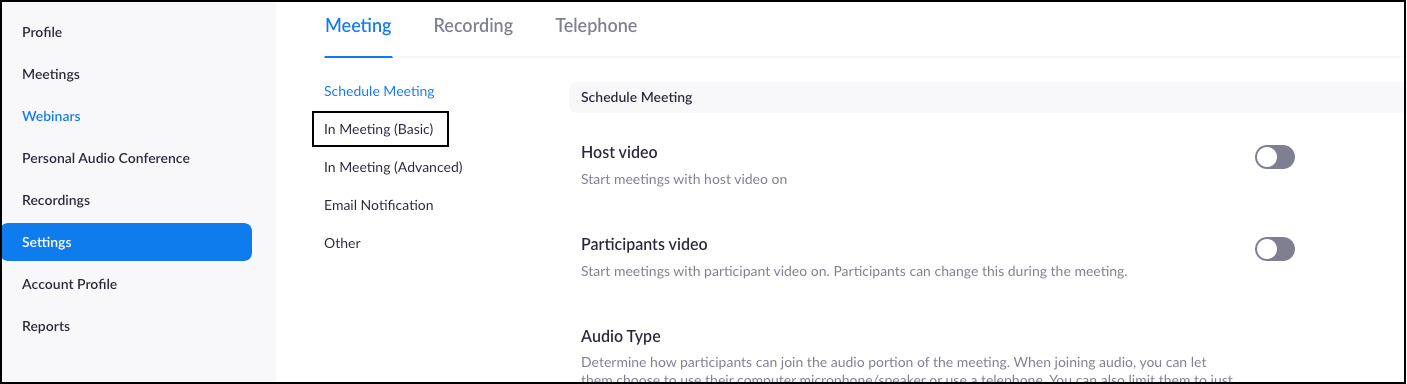
Scroll down to the option “Polling” and make sure it is switched on.
To set up a poll, you first have to schedule a meeting or webinar. See “Scheduling a Zoom Meeting” and “Scheduling a Zoom Webinar” above for help.
Once you have scheduled a meeting, log into the web portal and click on “Meetings” or “Webinars” in the left sidebar. Click on the name of your meeting to go to the Meeting Information page. Scroll all the way to the bottom of the page and click the “Add” button.

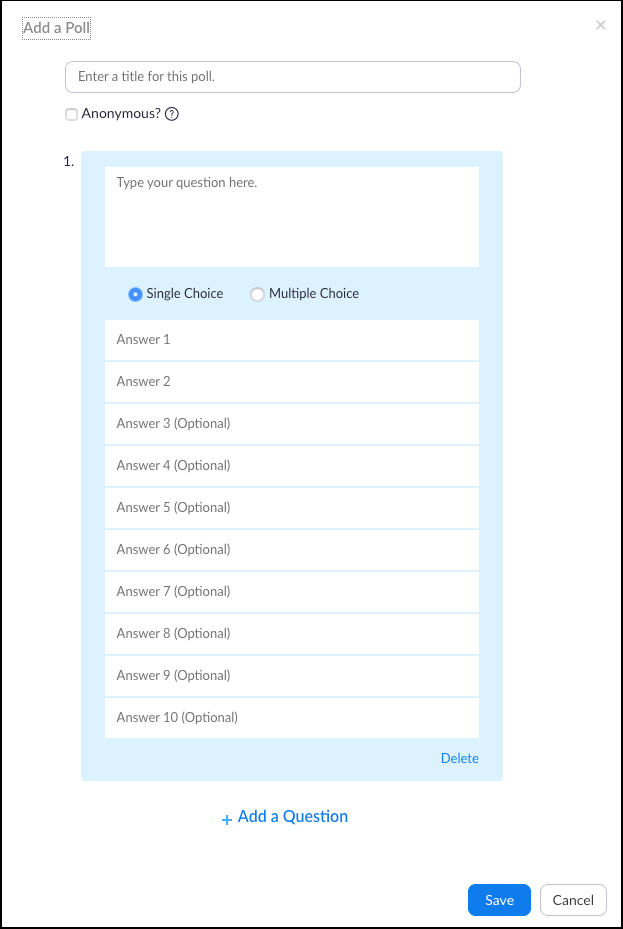
The “Add Poll” box will pop up. Enter a title for the poll. If you want the results of the poll to be anonymous, check the box. Note that poll results are always anonymous to the participants, but the host will be able to see results by participant if they aren’t anonymized. Type your question and answer choices, and select whether participants can choose one answer or multiple answers. If you want to add more questions, click “Add a Question” at the bottom of the window. Once you are finished, click “Save”.
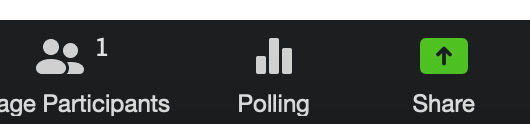
When you start the meeting, you will see a “Polling” button in your meeting controls. If you click it, you will see any polls and questions you have made for the meeting. Click “Launch Poll” to start the poll.

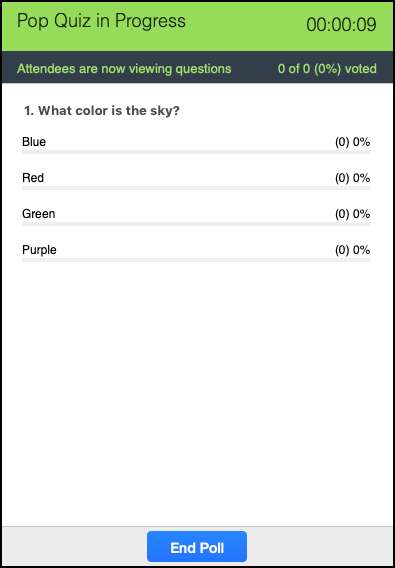
As the poll is running, you will see the results as participants answer the questions. There is also a timer in the top right of the window. Click “End Poll” when you want to stop polling.
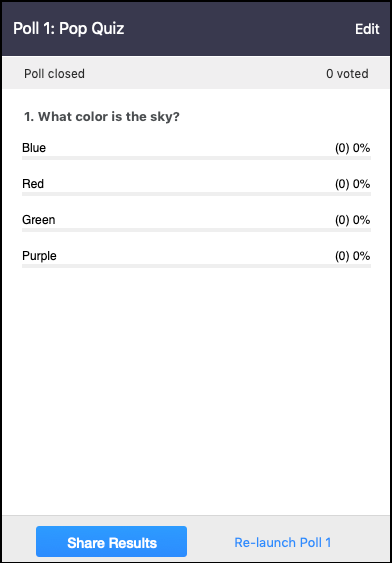
After you end the poll, you will see a results screen, showing the results and how many participants voted. You can share the results with the participants with the “Share Results” button. You can also run the poll again with the “Re-Launch Poll” button, but this will delete the results from the first poll.
Breakout Rooms
The video covers the different settings for breakout rooms and how to use them during a meeting.
Breakout rooms allow the host to split the participants up into smaller meetings for discussions or activities, and then return everyone to the same meeting with the host without having to start and stop multiple meetings.
First you will need to turn on the setting through the web portal. Log in and click “Settings” in the left sidebar, then click “In Meeting (Advanced)” in the secondary sidebar. “Breakout room” is the first setting in that section. You can also turn on a second setting which allows you to assign breakout rooms ahead of the meeting time for scheduled meetings with pre-registered users.

After this setting is turned on, you will see a button for Breakout Rooms on your controls once you start a meeting.
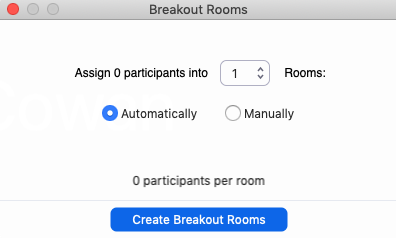
When you click on the button, you will get a dialog box with options for dividing up participants by number of rooms and number of participants per room. You can assign participants manually or automatically. When you are done with the settings, click Create Breakout Rooms.
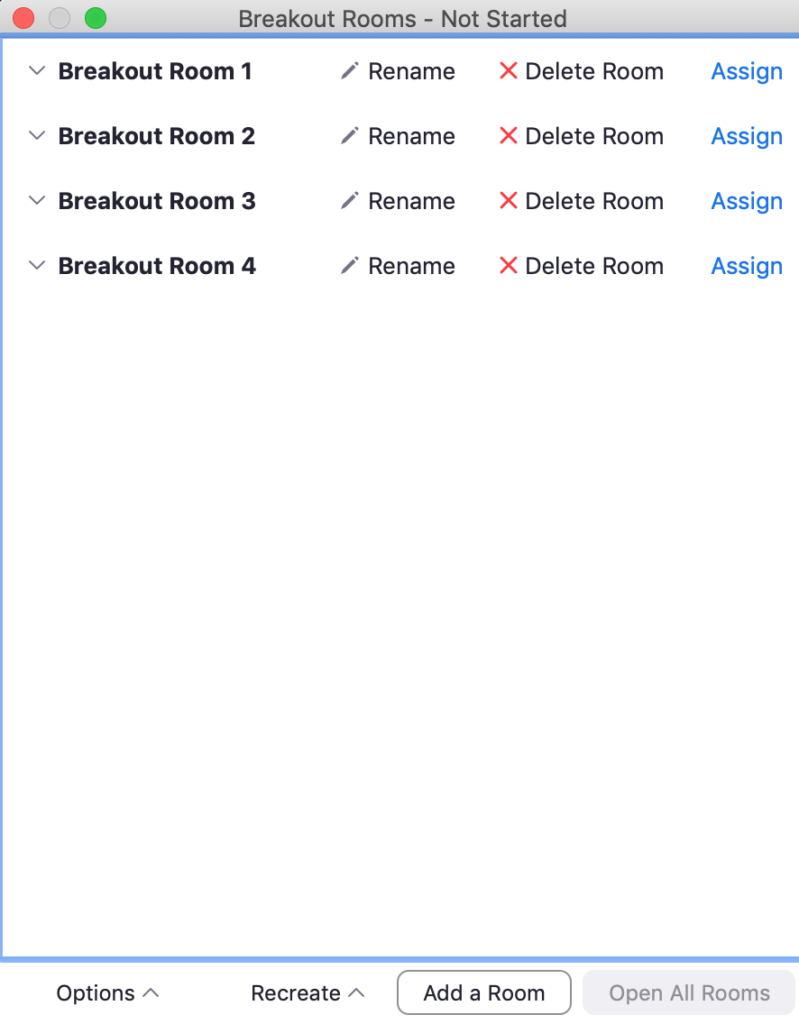
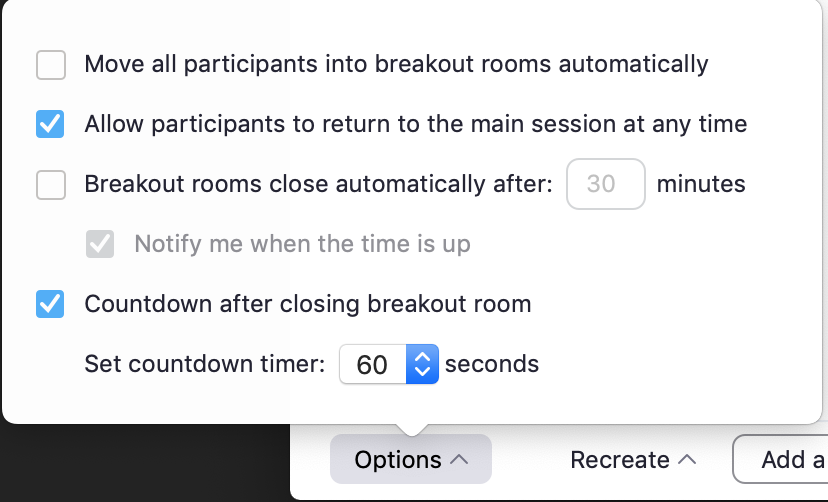
Creating the breakout rooms doesn’t start them automatically – the next window to pop up will show you the rooms. From here, you can rename and delete the rooms and reassign participants as needed. You can customize further with the Options button at the bottom of the window, including setting a timer for the rooms and allowing participants to decide when to rejoin the main meeting. Clicking Recreate will bring you back to the previous dialog box and delete the rooms you have created. When you’re ready to start, click Open All Rooms.
While the rooms are open, you can select Broadcast Message to type a message to all the breakout rooms. Once you are ready to return everyone to the main meeting, click Close All Rooms. If you set a countdown in the options, it will start counting down in each room once you click the buttons, and return everyone to the main meeting once the timer runs out.